And we continue with Ratatouille!!!
This isn't quite the last post for Ratatouille. This is for all the extra stuff that accompanied the cake (like cupcakes and cake pops). But i promise that this post will be super small. Especially since most of the cupcake stuff is already done (;
Usually just the cake is suffice, but since I was doing the whole cake table for the party, I went all out with it (:
Now, I'm sure you all remember the veggies and the cooking tools from my first few posts. Well, the veggies got spread around between the cakes, the board (you'll see that on the next Ratatouille post ;D), and the cupcakes. And the cooking tools all went on the cupcakes (:
So once you know how to make the veggies and the cooking tools, making these cupcakes is easy peasy. All I did was use the Tip 1M to create the swirly effect on the cupcakes. It's very simple. You start on one end of the cupcake and you work your way around the edge, moving towards the center. As you move with the tip, keep squeezing, and once you reach the center, release and pull up. Now, I like just doing this one layer, but Wilton teaches to do a second layer. You can see their instructions here. The way they do the first layer is the same way I do mine, except I squeeze more to make more icing come out and make the center larger.
Once I had my pretty swirl, I squished the tip with one of my veggies or cooking tools. So my cupcakes looked all pretty and Ratatouille-y like
Here's a close up
Another one:
I took the bowls and put icing in them too, to make it look like there was actually food in there, and it doubled as something to make the spoons stick.
Here's our last close up of the cupcakes (:
But cupcakes aren't all that were made! Cake pops made a scene too!
Instead of using regular chocolate to dip my cake pops in, I used colored chocolate* to make pretty red pops.
And to keep with the Ratatouille theme, I cut out some little fondant leaves and glued them on the pops to make pretty tomato pops
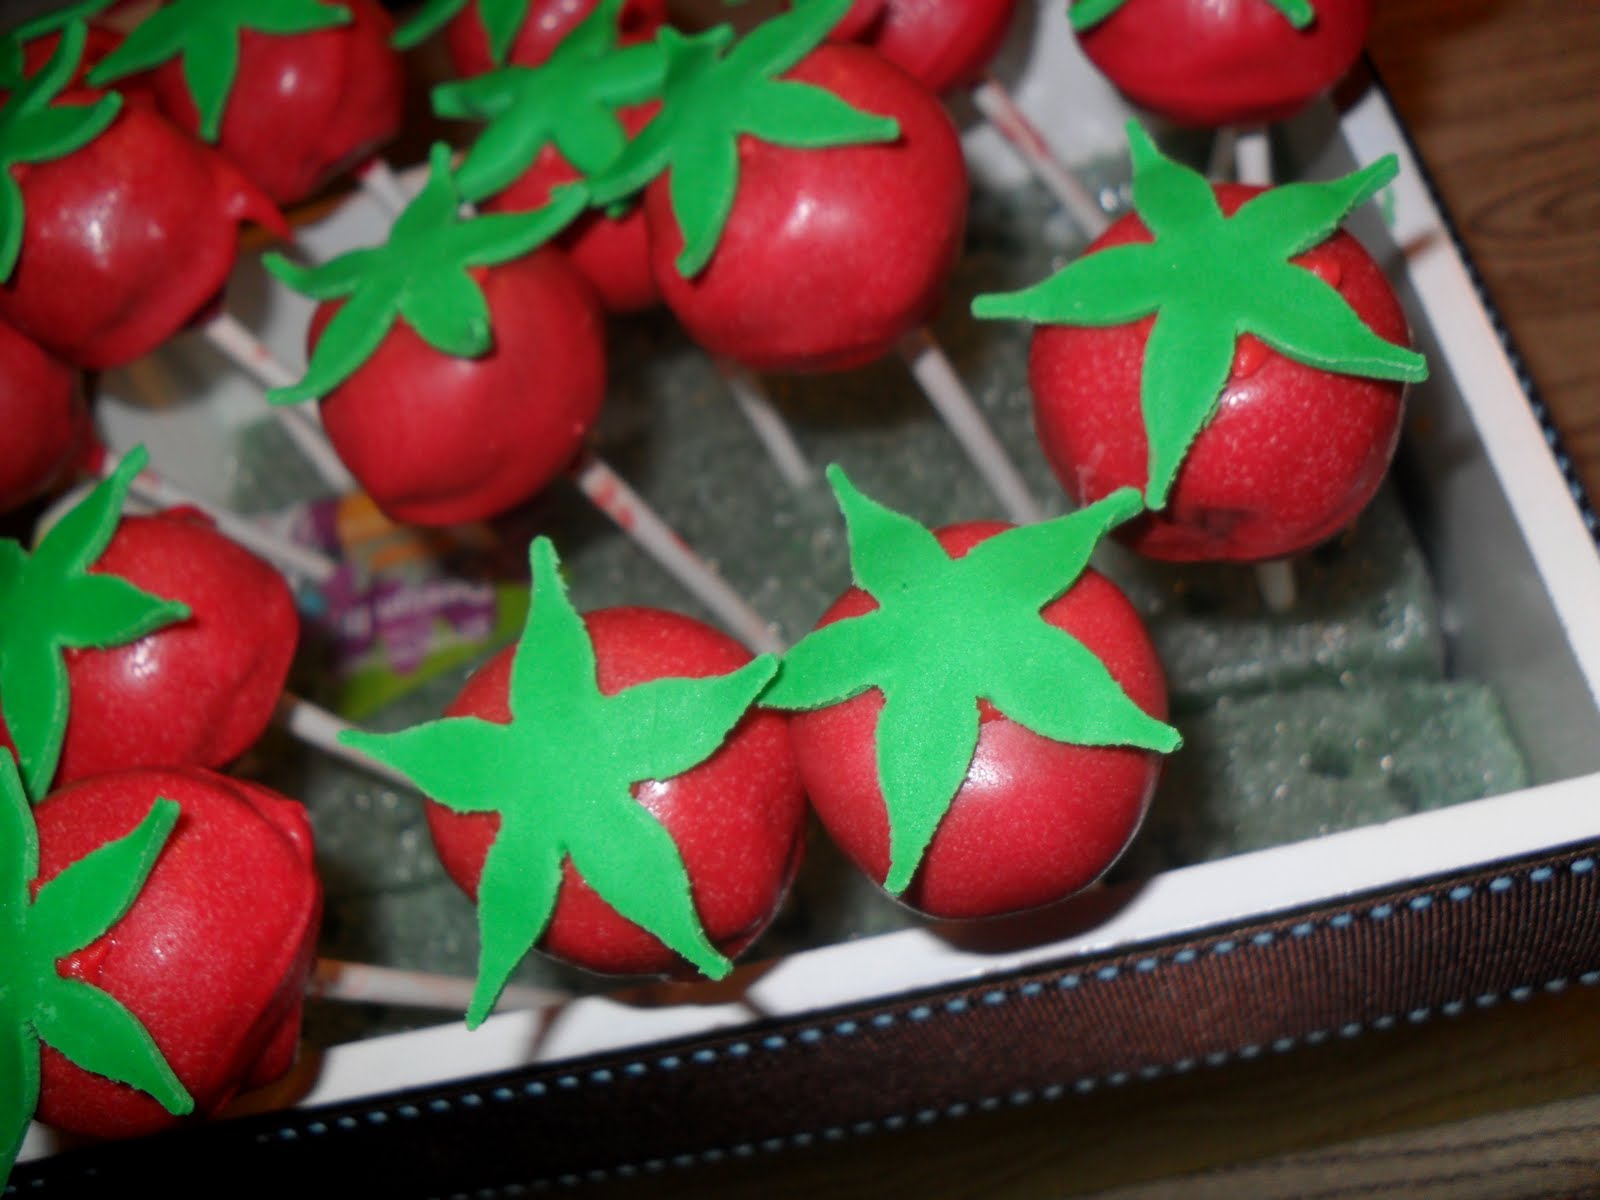
And those were our tomato pops! =)
That's it for this post folks, stay tuned for the ultimate Ratatouille finale!!!!
*I don't know how you make brown chocolate into red, so I just went ahead and bought already colored chocolate. But if you're gonna use white chocolate or vanilla, try coloring it.
Showing posts with label cake pops. Show all posts
Tuesday, May 24, 2011
Saturday, May 21, 2011
Pop Goes The.... Cake?
Ladies and gentlemen, I am pleased to announce that I am back from Argentina!
I had the time of my life there and learned a lot from the conferences. We didn't win any prizes, but we did make a lot of friends and learned a load of useful life lessons (: I hope I get a chance to go back next year!
Unfortunately, as soon as I got back from my week of fun, I got sick =( I toughed it out on Monday and Tuesday and got caught up on all my school work. But on Wednesday I caved in and stayed home sleeping, and when I went to doctor on Thursday I found out that I have strep throat =O So I slept it out yesterday too.
And today I feel just like Hercules!!! ... In that scene when Hades takes away all his god powers and he can barely walk.... Yup, I love meds (NOT).
But anyways, enough complaining. It's time for me to return to you, my lovely blog readers (:
Today's post is all about cake pops!
Now what is that, you ask? Well, just to be short, it's a delicious mouthful of cake, in lollipop format*
Yes, it is. A beautiful, little convenient bite of cake. Icing included (;
But how do we make this delicious fun-sized cake? Easy! I'll teach you how in 6 easy steps! Crumble, Ice, Stick, Cover, Sprinkle, and Enjoy =)
Step One: Crumble
Now this part is what makes cake pops so convenient. They're made out of cake crumbs. So you can just use the pieces of cake leftover from when you carve or even out a cake. Or you can just bake a whole cake and crumble down the whole thing. I like sticking it in the Kitchen Aide for a while and just taking the crumbs out.. Like this:
Step Two: Ice
The next step is taking some icing and mixing it well into the crumbs. You want there to be enough icing so that all the crumbs stick together and work almost like playdoh. It's going to end up looking like a big blob of cake.
Then, using a spoon or an ice cream scoop, make little balls out of the cake blob and put them on a cookie sheet. But make sure to cover the cookie sheet with wax paper or aluminum foil first!
Step Three: Stick
Once you have all your little chocolate balls, refrigerate them for about 15 minutes so they keep their ball shape. During these 15 minutes, melt some chocolate. Because once you take the balls out, you're going to dip the sticks into the chocolate, about three fourths of the length of the cake balls. Then ever so gently insert the sticks into the balls,
And now you have pops! Place them back into the fridge until the chocolate is hardened.
Step Four: Cover
Once the chocolate on the stick is hard and the stick doesn't come out of place, you can take them out again. Again, you're going to need melted chocolate to dip the pops in. Now here's a commonly made mistake, do NOT dip the pop straight into the chocolate, or else the chocolate will get all cakey and it'll be icky to work with. So get a spoon and just use that to spread the chocolate on the pop. Use the spoon to even it out nicely.
Isn't it purty?
Step Five: Sprinkle
Now, as soon as you're done dipping the pop in chocolate, you need to sprinkle it, or else the chocolate will get hard and it won't stick. I think sprinkling is pretty self-explanatory? Just get a spoon and pour sprinkle all over the pop (:
And once you're done sprinkling, just set it somewhere (in upright position) to let the pop dry. I like floral foam personally. I cover it up with aluminum foil so the green stuff doesn't make a mess. Then I just leave it there drying for a while until the chocolate is hard.
Once it's dry, I can either wrap it up for transport,
Or I can just move on to step six and enjoy (;
Step Six: Enjoy
So now you can just sit back, relax, and eat to your heart's content!
![]() |
Courtesy of Don't Unfriend Us |
*Which does NOT mean you should lick it. It's still a cake people.
Subscribe to:
Posts (Atom)