Showing posts with label fondant. Show all posts

Monday, May 30, 2011

It's A Wrap!

It's the moment you've all been waiting for!!!


*Drum roll*


It's the one!


*Faster drum roll*


The only!


*Super fast drum roll*


RATATOUILLE FINALE!!!!!! 


*Lots of clapping and cheering and whistling and hooping and hollering, et cetera et cetera*


Yes, it's true ladies and gentlemen! Finally, you will see the final product that has been on your hearts and minds for so long now!


But first, I gotta do it step by step before showing you the end (; And the final product included cupcakes and cakepops, so hang in there, because we'll get around to it.

Just kidding.

Here you go (:


It looks pretty sweet (: It got a LOT of compliments at the party, which made me happy (:


Wrapping things up was fairly simple. All I had to do was make the picnic mat, the menu, and put borders around the cakes.

Starting off with the mat, first I cut up a lot of red and white squares (2x2). I arranged the red squares on the mat (see how it has measurements on it to help me out? It's awesome :D), leaving space for the white squares. 


Then I arranged the white squares inside the red squares


Then to make it one piece of fondant instead of a lot of individual squares, I rolled it together. Now this was a doozy. I forgot to put some shortening on the mat so it wouldn't stick. So after rolling it, it took me forever and a lot of help from my mom to get the picnic towel off of the mat and onto the board. My recommendation? If you're gonna make a mat this way, go ahead and do it straight on the board.


The final towel still looked sort of nice though. But it had a lot of imperfections which I later covered up with veggies. The next step was giving the cakes a border. I didn't take any good pictures of that, but here's a picture at an angle that you can see the borders from.


The pot's border was time consuming, but it looked good. Initially I wanted to make it flames, but I decided that I didn't want to go through the trouble, so I did my favorite shell border, multi-colored. Then the cheese's border was just the Tip 3 all the way around.

Next was the menu. I cut out a rectangle* from a dark color, then I made a border for it using an orange-y copper color.


Then all I had to do was write on it and I went with the tiny jagged end roller that I used on the cake purse  to create a border. It looked pretty cool and it saved the cakes from any writing**

Remy and the veggies were already ready, so the rest was really just a matter of arrangement. The main focus was covering all of the imperfections on the picnic mat. So first Remy got placed in between the two cakes


Then the veggies just got tossed around conveniently wherever there was an oopsie.


Some of course where just placed wherever for aesthetics.


Veggies all over the place!


I think in the end, it looked quite nice


What do you guys think? (:


I always love to hear some feedback (:


*Can you tell that it's the same fondant that made Remy?
**I hate writing on a perfectly good cake. It just ruins it. Some cakes need writing, cause they're made that way, but pretty sculpted cakes or cakes that are meant to be something (like a cheese or a giant pot) shouldn't have writing -_-

Monday, April 25, 2011

Happy (politically incorrect) Easter!!!!

A very happy Easter to all of you! Or Passover, whichever one you celebrate. Or, if you don't celebrate either one, you can take this post as a spring thing too (; Or, if you hate spring, it's just a floral post. And if you hate flowers as well... Then there's nothing I can do. Go reread a non-floral/springy post.
See how I appeal to all people? I can be very politically correct when I want to (;

Let's stray away from these political correct/incorrect things and start our cake. Because no matter what, cake is ALWAYS correct (;


Here is our lovely ganached cake. I think I have gotten considerably better at ganaching ever since our Mini Cake disaster. The lines are there on purpose.


Because that pretty plastic paper underneath is a guideline for this pretty design called a basket weave. Just to give you an idea on what that is, here's my practice board for it:


It's going to make the cake look like a basket. (: So with the guidelines on the paper, I made marks on the cake to provide a guide for the basket. 


Then on one of those lines I drew a long icing strip using Tip 47*


Then on that line I drew a horizontal line across it. Pay attention now, or else you'll miss it. The horizontal line will be drawn across the vertical line, half of it on either side. Then underneath of the end of either side of the line, there's a little dot. Then once the lines are drawn all the way down the side of the cake, another vertical line goes above the end of the lines. And you go again.


This is just a quick overview on the basket weave**, but I'll explain step by step with better pictures on a later date. After a long painstaking time icing the cake, it turned out like this:


I also used Tip 22 to create the shell border at the bottom and Tip 16 to create the shell border on top.

And of course, no cake looks perfect without a couple of touch ups. So to stay in the Easter/spring theme, I chose flowers***. And I pulled out my handy dandy fondant to make some flowers. (;
First, I needed some flowers to cover the defects in the basket.

I cut out a bunch of small purple flowers then came along with a little wooden ball tool to poke a shape into the flower.


I left the flowers drying into that shape, and once they dried, I came with the Tip1 and made little dots inside the flower as stamen.


There were also little green leaves that got glued on behind the flowers. Those were made using cutters (I'm not THAT artistic now. I wish I was though. Then I could get a knife and cut perfect leaves out of fondant =D)


And of course, the magic of cakes and fondant is that whenever there's a mistake, you just use some other piece of decoration to cover it up. So whenever there was a line that was too wiggly or didn't meet with the next part, I put a flower over it to cover the imperfection.


By using pretty decorations, we can make imperfections look perfect (:


But even as lovely as the sides look, we need to make the top look a little less bland, because even as delicious as that ganache looks, it's not Easter-y/springy enough. So the solution is....


Daisies (: Now here's something you should know. I LOVE daisies****. Especially when they're fondant. I have nothing against real daisies or other fondant flowers, but there's something about fondant daisies that is just very appealing to me. I don't know if it's how cutadorgeous***** they are, or how easy they are to make, or how easily they fit in with other flowers, but they're just awesome.

Now these four were pre-made (by me, not a store). I don't know why, but every time I make daisies, there always seems to be a leftover or two (or in this case 4). But still, these four weren't enough so I went and made lots more.


I cut the daisy shapes out from the white fondant and put them to dry on those spoons and white shaping cups (both meant to shape the flowers, just in case you didn't catch that). Once they dried, I created the center part with yellow icing again.
I ended up using a different daisy shape than last time to shape the daisies, so I had multi-sized daisies (which worked out great).


After making the flowers, I just arranged them nicely on the cake.
I put a big daisy in the center with lots of little daisies surrounding it.


That was the main focus for the cake, then I just went along the border with the rest of daisies, still creating an appealing look by spacing out the big daisies among the small daisies.


And of course, I also used those lovely daisies to cover a few imperfections, which most certainly were not as bad as the ones on the sides.


This was our final Easter/spring cake (:
My family had the pleasure of eating this 4 layer chocolate, yellow, chocolate, yellow, ganache-filled flower basket. Not that the kids needed anymore chocolate... They certainly got more than enough chocolate to last them the rest of the year. Eh, but hey, it's Easter. Enjoy yourselves (:


*If you're not acquainted with icing numbers, then this probably makes no sense to you. But for now all you gotta know is that different tips create different designs. I might or might not explain them better later.
**If you don't like my instructions, you can see Wilton's here.
***Well, if I'm making a basket I might as well put flowers in it (:
****What isn't cute about this???
I don't think they're as cute as the fondant ones, but they're still adorable in real life.
*****Cute, adorable, gorgeous

Yes, I do realize that this was posted the day after Easter, but I was busy feeding little kids chocolate-yellow-chocolate-yellow ganached cake on Easter, so the post had to wait one day.

Saturday, April 23, 2011

Pots and Pans

This is a continuation of the Ratatouille posts, because as nice as all the little fondant figurines are, they're not actual cakes. And as much as I love snacking on some fondant scraps*, fondant will never be as delicious as cake is, because cake is just amazinggggggg <3
Obviously, Remy and the veggies were made to accessorize the cake, so here is the cake (or at least one of them) that goes with Remy and his entourage.

Every piece of art begins very humbly, and so does a cake. And here is the making of Ratatouille!!!!

*Ahem* drum roll please?

*Drum roll*


What? Isn't this good enough for you???

Sigh....

This is only step one guys.
This beauty (or not so much, he's a little plain still) has this delicious chocolate cream inside called brigadeiro. It's a Brasilian sweet made out of condensed milk and chocolate powder. It's delicious <3
There are two cakes, one stacked on top of the other with the brigadeiro in the middle. Then there's a smooth layer (sorta) of buttercream covering the cake. It's only a crumb layer so it doesn't have to be perfect.

After letting the cake rest for a while, allowing the icing to become a little more stable, I covered it with brown fondant. Now here's the thing about dark colors: they SUCK! It takes forever to make a dark shade of fondant. It requires a LOT of coloring, which usually paints your hands as well as the fondant. So making dark colors is never fun. Brown, red, dark green, purple, etc. They're all in that category. Black is too, but I cheat when it comes to black. I bought a tub of Duff's black fondant so I wouldn't have to spend 30 minutes and two little tubs of coloring every time I needed black (which surprisingly enough, is often). So I don't have to color the black =)
But the black isn't what's important right now, brown is. The same brown that was used to cover the cake, was also used to create the top of the pan. The brown got rolled into a long snake, then wrapped around the top of the cake, like this:


I know that this doesn't look very pan-like, but it will very soon. Because this isn't just an empty pan, it's a pan with food inside! So I put some yummy food** in there (:


All I did was throw some buttercream on top and gently smoothed it out*** with my spatula. Spongebob was right, spatulas really are magic!


Doesn't it look purty? (:
But unfortunately, no one wants to eat plain, white, creamy soup. So let's spice things up a bit. First ingredient....


Peas! Remember these guys? They finally made their way onto a cake (:
But as awesome as peas are,**** this stew is still looking a little bland to me... So let's chop up one of those big carrots we made in the beginning and toss them in there too.


There. That looks MUCH better (:
But it's still missing something... The stew looks edible, but our pan is still kinda iffy. It needs a handle.

And as much as I've been calling it a pan, it's really more of a pot. So the handles were short and stubby, like pot handles.


These were fairly simple. All I had to do was wrap the brown fondant around these plastic tubes, then tie them up in a way that they would make the shape I wanted. After drying overnight, I slipped them off the tubes and stuck them into the cake. But because of the way they were put in, instead of using gumpaste glue, I used icing to make them stick.


This is what the pot of stew looked like at the end (can you see the pieces of the board? Take it as a sneek peek into the next post ;D)

We are now one step closer to finishing the Ratatouille posts!
Next is the second cake that went with the set, then how I tied up the ensemble for the party. So stick around if you want to find out how it turned out!


*Only when there's no one looking cause it makes my mommy mad (;
**And by food, I mean buttercream
***Slightly, I left some ruffles to make it look natural
****Come on, have you seen Veggie Tales? The French Peas are the bomb! And of course, we are NOT, under any circumstances, allowed to eat cartoon characters. So no peas for dinner, ever again. Mwahaha. Take that mom (;

Thursday, April 21, 2011

Ratatouille Cake... The Chef: Remy - Part 2

Remember Remy? It's been a while. Remy had a little 'fall out' with his arm, and well... It just took a while to um... remedy the situation. But now that everything's all fixed again, Remy is back and ready for action! (Just don't touch his arm... please?)

Day Two? Eh, not so much. Let's stick to Part Two.
Well, what's a rat without his hands, feet, and tail? Or a chef without his hat (We've gone over this remember? A magician needs a sorcerer's hat and a chef needs a chef's hat) and apron and dish towel? So that's what we worked on during Part 2.


First off, let's see how well Remy did without all that extra back (and head and arm) support.


Yes, I am aware that this is Remy sort of already ready, but I forgot to take a picture before I started. Usually I just take pictures of the final product, so this is all new to me. Please bear with me, I promise I'll get better at this (:
Anyways, Remy is holding up great! He can even hold his wooden spoon!

Hehe. That was written before the 'fall out'. Point is, he could hold the spoon before losing his arm.

Remember how I said that the nose and eyes were hard to make? Yea, well the hands beat those BY FAR! Once again, two pink round cuts of pink fondant*, but this time a little thicker. About a third of an inch high. Then I rolled the round cut into an oval, and came along with my handy, dandy, small, but sharp knife and cut out fingers for this sucker. Then I rounded them into finger shapes using my hands. The thumb wasn't anything special, I just made it shorter**. Sounds simple? Yea. Done easily? NOPE. These hands took forever to make. I tried and retried a good 20 times. Pesky hands... 

Well, to add insult on injury, as I was putting the hands on, one of Remy's arms decided to fall off (uncooperative much?). I fixed this pretty quickly with a small toothpick*** and left him drying a little longer. While Remy was drying his hands, I worked on his feet, which weren't quite as much work as the hands, but still not the easiest part of this cake (I still can't believe I thought the nose and eyes were difficult... Those were kindergarten material compared to hands and feet...).

That was his right arm... The fall out occurred with the left. So neither of Remy's arms were very nice to me... =/


These were made using the same method as the hands, except thinner and the feet have less fingers (...toes) than the hands. I left them drying on that little wavy drying fondant rack while I worked on other stuff so they would have a nice arch.

And of course, it's not a rat if it doesn't have a tail!


The tail is fairly simple to make. Just get a log of pink fondant and roll it in your hands until it looks like a tail and then cut it to the size you want it to be. And of course, make the tip thinner than the part that connects to the rat.


And these little suckers are whiskers! Same technique as the tail, except smaller and in white. Once they dry, they'll be going on Remy's snout.

And these little guys are...


You guessed it! Teeth! It's kind of hard to see, but it's essentially just a small white fondant square with a line cut down the middle.

Now that we have most of the essentials for Remy, let's have a review really quick, Every chef needs a...

...chef's hat! So of course, Remy needs a Remy-sized chef's hat! 


This hat was made in the same fashion as the ones made for the cupcakes, only longer. Remy also has a little collar and towel. The collar is just a very thin strip of white wrapped around his neck, and the towel is a rectangle shaped piece of fondant that got draped over his arm.


The next part, in theory, is fairly simple. All you have to do is glue everything on Remy! Easy right?
Well, you have to be very careful as you do this, or else Remy will fall apart. Poor guy, he's been through enough don't you think? So let's be very careful with him.

First, on go the feet. They were fairly simple to glue on, considering the rest of Remy. All I had to do was measure them in a way that I thought looked good then glued him up. The whiskers, on the other hand, were a pain in the butt. I glued them on, they fell, I glued them on again, and they fell again. After maybe the fifth repetition of this tedious process, I gave up and just stuck the whiskers in his face, creating a small and unnoticeable hole where the whiskers could fit in.


The teeth were pretty difficult as well, but because they're so unnoticeable, I pushed them back a little to make them fit in the hole of his mouth**** 
The hat was very simply glued on, since Remy's head was so nicely flat I didn't have much trouble with it.


Finally, the tail just got glued on veryyy gently. But it kept falling off, so I waited until Remy was completely ready and on the cake before attaching his tail.

And that's Remy in the making!
In the end I just gave him his wooden spoon and put him in between a pot and a slice of cheese.*****


And that's all for this post. Stay tuned to learn all about Remy's pot of stew and his chunk of cheese (;


*With lots of gum paste... catching on yet? (;
** Only Pixar would give a rat thumbs... And Disney of course, we can't forget our favorite mouse, Mickey (:
***Or maybe it was a big toothpick that I cut into small toothpick size
****Which now that I think about it, isn't that where they're supposed to be?
*****I'll teach you how to make those soon (;

Tuesday, April 19, 2011

Spring Is In The Air

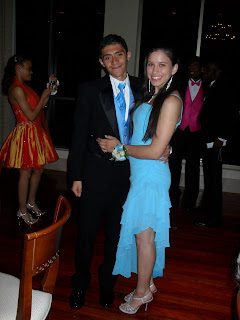
This weekend was prom, and needless to say, it was amazing* (:
We had dinner at a pretty restaurant on the river and I finally got to see my boyfriend in a tux (;


But anyways, enough about my weekend and onto the baking goodies (:


This post is going to be a little different from past posts because it's going to be about cupcakes! I bet you thought that I only did cakes huh? Nope, I do cupcakes too, and cake pops too. I've even done cookies once (But I forgot to take a picture =/ darn it).

Anywhooo, I pulled some cupcakes out of the freezer and got ready to have some fun-sized** cake fun (:


Now my theme is spring, because all the flowers blooming and birds singing outside have gotten me in a spring-y mood. Soooo, spring cupcakes!!!

I had my incredibly reliable best friend, Sana, help me come up with ideas, and bugs won.

...

Yes, bugs.

But they're cute bugs, don't worry. Like bumblebees*** and ladybugs (:

I have 12 cupcakes, so we're going for 6 of each. First, I rolled out a long piece of black and a long piece of yellow and I cut out 6 round circles from each one. This makes sure that the cupcakes will be completely covered with fondant so we can decorate. Oh, and here's a big surprise for you! No gumpaste required (; Gumpaste is just for when you need the fondant to harden quickly.

Now that we have 6 yellow circles and 6 black circles, we can just stick them on the cupcakes.


Now for the ladybugs we're also going to have to make 6 red circles as well. I forgot to take step by step pictures for these guys so bear with me.

The 6 red circles are going to be elytra (which is really just a really fancy term for ladybug wings. I wish I was that smart, but yes, I googled it). So with a pizza cutter (mini version), I came and cut out a little triangle from the red circle, so when it goes on the ladybug it looks like opened elytra and you can see the abdomen of the ladybug. The elytra then get placed on the abdomen. Then I cut out little mini black circles of different sizes to put on top of the elytra (I've decided that I like that word ;D). I also needed a circle (Actually 6) thicker than the ones that go on the elytra to be the face. Then with tiny pieces of white I made cute little smiley faces for my ladybugs (: Their official scientific names are coccinellidae, might as well let you know since I'm googling (;


Aren't my coccinellidae adorable? =D

I agree that the iris-less eyeballs are kinda creepy, but that's why I put even smaller black dots on them. Pictures of that later.


Now, for the Andrena (Hesperandrena) limnanthis.**** Again, I failed at taking step-by-step pictures =/ So i will try my best to paint the picture for you with my words.

I rolled out another slab of black fondant and came with the ribbon cutter to cut the fondant into long strips. But I didn't disconnect the strips yet, instead I went over them with the same round cutter I used for my initial circles. Now I could peel the strips back and fit them perfectly on the yellow circles. Then I made their faces the same way I made the ladybugs' faces. I arranged all these lovely yummy chocolate buggy cupcakes on my cupcake stand and here they are (:


These little pesky critters got eaten up in seconds by the little 1st grade pesks... er, I mean kids*****, that I teach at Sunday School. It was our very last class together for the school year. I doubt that their parents had fun putting them to bed after all the pizza, ice cream, soda, cake, cupcakes, candy, etc we stuffed in them. Oh well, it's not like I give them cupcakes EVERY week... Oh wait, yes I do... Hmm. At least they only see me once a week =)


*It also contributed to why the posts have been so few and far in between. I was busy prepping nails, hair, etc, then finding restaurants, then sleeping the night off the next day.
**Will someone please explain to me what exactly is fun about less candy or less cake??? It's quite mind-boggling to me and I've searched all over for the answer, and all I can come up with is the fact that it prevents my waist from getting huge.
***They stop being cute once they sting you...
****That's a bumblebee, just in case you didn't already know. But of course you did, cause it's very common knowledge that bees are Andreas. That must why my friend Andrea is always busy... Hmm. Interesting.
*****I'm totally kidding. I love those kids. They're the best class =) First graders are so cute and adorable. Sigh... I miss those days.

Just cause I couldn't help myself from posting another prom picture (: